Have you ever heard of a wall tent? You may be familiar with backpacking and family camping tents put out by various companies but there is another breed of tent used by hunters as well as the mineral and oil exploration industry. And that’s the wall tent. The wall tent has been our home multiple times over the last 17 years. If you read my book, Off Grid and Free: My Path to the Wilderness or listened to the audio version you know we lived in an exploration tent for about 4 months while we built our Saskatchewan home. While working in the mineral exploration field, I helped build and manage “tent cities.” These tent cities usually consisted of 12 tents including one designated as the kitchen. The wall tent is perfect for those who need a substantial “home” while building a new homestead as we are, preppers who want a back up shelter as well as those who enjoy the outdoors and would like a semi-permanent set up. Let me tell you how we made a wall tent, our temporary home.

Tent with Rainfly over Porch
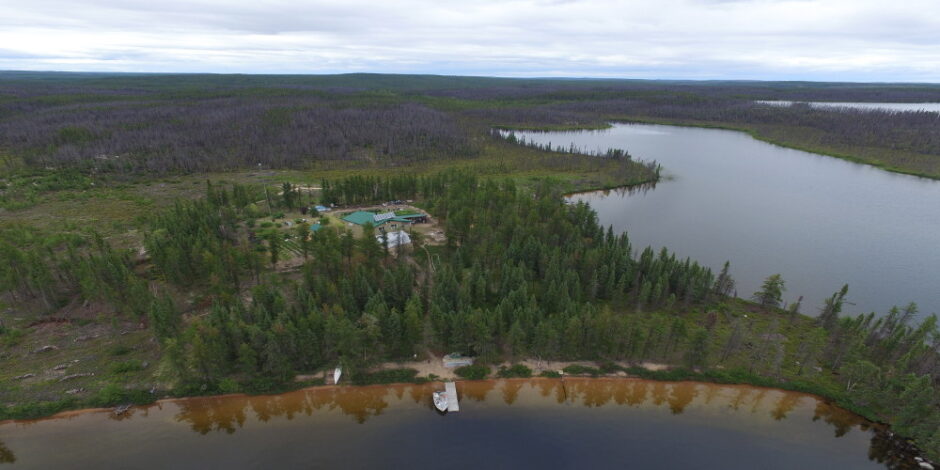
Wall Tent, Our Temporary Home
I spent weeks researching and contacting various tent makers across Canada and the United States. One thing we were adamant about was 13 oz. canvas material with Sunforger. Sunforger is a water and mildew treatment that helps protect the canvas. I talked to probably 20 different tent makers and a 13oz canvas tent can’t be found in Canada. At least no one I talked to would make it. I ultimately decided to buy our new home (tent) from Denver Tent. I developed a good relationship with the sales lady and felt quite comfortable that this tent would do the job for us.
The sales lady was able to answer every question I posed including some technical ones. You wouldn’t think a tent is that technical but this was going to be home for up to a year and it would need to endure some potentially severe weather. Seams, reinforcement at stress points and tent frame material were some of my technical concerns. Here on the coast of Nova Scotia, a couple hundred feet from the ocean, we will have gales, downpours and all round nasty weather to contend with over the course of the next year. If we get the house done sooner, that will be great but we are prepared for living in the tent long term.
How many tents have maple kitchen cabinets or a utility sink and toilet? How about a refrigerator which is handy for grabbing a cold soda on a hot day or a sofa to lounge on. And of course we have satellite internet and WIFI just like our wilderness home in Saskatchewan. A wood stove rounds out the luxuries. My point is you can make these wall tents pretty deluxe if you wish.
Ordering Our New Tent
I did a couple of extra things when I made our purchase. I ordered a 14′ X 17′ 13 oz canvas tent with 2 extra sets of metal frame couplers which enabled us to reinforce the entire structure with closer spaced wall studs and roof rafters. I wasn’t sure what to expect from these metal couplers since the picture on their website was hard to gauge. But they are quite rugged. The internal frame is made up of 1.315” Top Rail fencing galvanized steel tubing that I purchased from a local fencing company. Here in Canada, the Top Rail is a tiny fraction smaller than that but it works just fine. This combo of couplers and rail form a tough, durable framework. The tent has withstood 50 mph winds already. The only thing that happened is our rain fly partially blew off. This occurred because an excavator had recently cleared our tent site and the soil was still soft so some of the rain fly stakes were uprooted. Since then I’ve pounded 30 inch rebar in some spots to serve as anchors. The tarp will stay put now.
The other thing I did when I placed our order was to order a rain fly for a 16’ X 20’ tent and then add an additional 5 feet of fly. The larger footprint of the fly gives us better protection from rain and also keeps the sun off the canvas top and sides. Over time the UV (ultra violet) rays from the sun will have a tendency to degrade the canvas fabric so the rain fly will protect us in multiple ways. The extra 5 feet will be coverage for our porch.
Basic Tent Platform Construction

Tent Platform being Built
So let’s get down to construction. You can order the tent with a floor if you wish but we didn’t. Instead we built a wooden platform 14′ X 25’ feet long that serves as the floor. The tent comes standard with a sod flap around the bottom edges which is used to help secure the tent to the platform. Referring to the picture, you can see I nailed two 2X4’s together to create 4X4’s. Four 25 foot long 4X4’s create the carrying beams. We leveled them on cinder block using scrap wood and shims as needed. Then 2X4 were laid perpendicular 16″ on center for the floor joists. The ends of the 2X4’s were boxed in with another 2X4 and then a layer of 1/2″ plywood sheathing covered the structure for the floor.

Platform Floor

Completed Tent Platform
The walls of the tent are 5 feet. Working from the cut sheet provided by Denver Tent, I cut the wall studs and roof rafter from the rail tubing to their specifications. I used a heavy duty pipe cutter and it took an afternoon to cut all the material. The tubing is pretty heavy duty and it was a real workout cutting the stuff. At the time I didn’t have access to my vise or work bench to aid in this endeavor and instead I utilized the rungs of a ladder as a “work bench.”
Once I had all the tubing cut, it was a simple matter of sliding the tubing into the appropriate coupler and tightening the screw by hand but I didn’t over tighten. I tightened just enough so the pole would stay in place yet still have a little wiggle maneuverability. You’ll appreciate the little bit of wiggle room the couplers have when it is time to fit the tent properly on the frame.
Erecting the Tent
Here’s a tip. Don’t build the entire frame, sit it on your shiny new tent platform and then try to throw a big, heavy, bulky tent over the whole assembly. The best way is to assemble your roof structure and have it sitting right on your tent platform. It’s now easy to carefully open up your tent, make sure you orient the tent so the door opening is in your desired direction and position the tent over the roof frame.
At this point, the more manpower you have the better. Carefully lift up one side of the tent while a couple people insert the wall studs. Get all the studs on one side in the couplers. Because the tubing is open on the ends, you can secure the studs to the plywood platform by slipping the end of the pole over a screw or nail you have put in the floor. That will help to keep the wall studs in position on the floor and prevent them from sliding off the platform while you wrestle with the studs on the other side. Repeat the process on the other side by lifting that side while others place the wall studs in the couplers then put the tubing over nails or screws in the floor.

Tent Set Up
Because my cuts were so precise, we had quite a time wrestling the tent corners into their place. But the tent fits the frame like a glove. I like a fairly taut tent. Not a lot of material to flap in the breeze. You’ll be surprised how much variation there is in your tents flexibility based on temperature and moisture. It can be quite taut in cooler weather yet when the temperature rises, the material expands and loosens up.

Completed Tent
Which brings me to the final assembly. Along with the lumber for our platform, we bought a bundle of lath strips. Lath strips are roughly 1 ¼ “ wide X 1/2” thick and 4 feet long. Perfect for what we need to do next.
With the tent now sitting perfectly on its platform, I went around and snugged up all the coupler screws. The object now is to seal off the bottom of the tent utilizing that 8 inch sod flap. Starting at one corner, I grabbed the flap and pulled it down fairly taut. Then I laid a lath strip over the flap and used screws of 1 ½, to fasten that lath along the tent platform, about 4 screws per lath strip. I continued that routine until I had the sod flap secured all the way around the perimeter. Because I made the tent platform with the added porch, I had to modify the sod flap’s attachment on the front of the tent. The idea is to seal the bottom of the tent from bugs and breezes utilizing that sod strip.

Close up of Tent Bottom
Looking at the picture you will notice grommet holes along the bottom of the tent just above that attached sod flap. Small ropes are provided to secure the tent with those grommets. I tied the one end of the rope securely to the grommet. Then I tied another small knot on the other end to form a small loop. I used a simple overhand knot loop. https://www.youtube.com/watch?v=i3pIizxiB94 Next I put a 3 ½ “ nail in that loop and angled it down. I pushed the point of the nail into the tent platform and used the point as a fulcrum to pull the tent edge down. Once the tent was taut, I drove the nail home to keep it taut. I repeated this for each grommet at the bottom. Essentially, I was using the nail as a tiny pry bar to pull the tent down in each grommet and then secured the tent at that location.
Now let’s focus on the grommet holes at the eaves of each side of the tent. These points are additional tie down points to help secure the tent. The tent comes with a good quality steel stake with ropes so all one needs to do is tie a rope to each grommet hole in the eave and stake it down. The ropes have a sliding adjuster to take up slack or at times release tension.
The only times you will be concerned with these lines is when a storm is approaching and it’s time to batten down the hatches.
The last step is putting on a rain fly which is simply a rugged tarp made to fit over the tent and provide additional wind and water protection. A clever trick to get the fly over the tent, which is at least 9 feet high at the peak, is to attach 2 ropes to a couple of the tarp grommets then throw the ropes across the roof of the tent. Now it’s a simple matter of pulling on the ropes and the tarp will come up and over the tent peak. That’s the quickest and easiest way to slide the tarp up and over to the other side for proper fastening. Once the tarp was properly centered over the tent, I staked it down as I did with the tent grommets. The fly has the same arrangement of grommets. Ropes are also provided with the tarp. If you make a provision to have a porch as we have, you can order the fly any custom size you desire and it will come with a set of poles to hold up the front of the fly.
Join me next time when I’ll explain how we set the interior up with kitchen, bed, toilet and many of the comforts of home.
Until next time, keep the dream alive! We wish you a great day!
Ron and Johanna
If you found our site and this post of value, would you please click the “Top Prepper Sites” link in the right hand column to vote for us. Thank you so much!
Please subscribe to our blog if you would like email notification of new posts.
Pingback: Squeeze a House into a Tent - Off Grid and Free: My Path to the Wilderness
hello ron, my name is ken. my girlfriend and i moved from okc, okla to an undeveloped forest acreage in idaho. we live in a wall tent on a platform also. i wish that i had come across your site before our move. i look forward to reading more about your adventures.
Hello Ken,
Welcome. I’m glad you found us and you find our site of value. If you have any questions along the way, we’ll try to help as best as possible. Good luck! Ron
Pingback: Off Grid Refrigeration - Off Grid and Free: My Path to the Wilderness
Hey…thanks for the tip on how to get the tent set up. I’m building a platform 4 feet high and living in a tent for the next few months. I’m trying to figure out gutters for rainwater harvesting. Did you put up any and do you have any tips?
Hi Nini,
Glad to see you stop by. The platform is quite high up. There’s a lot of leverage up there for the wind to wreak havoc so my advice would be to make sure all the legs to the platform are stout and cross braced to each other. As well, the tent will need to have copious guide ropes splayed out. I’d suggest some orange flagging on all ropes. I know there’s little reason for walking around the tent but if one needed to do that, the ropes are more visible.
When we used an exploration tent to build our couple houses or I was deep in the wilderness living in exploration camps, we always used a secondary tarp on the roof to help protect the canvas as well as shed rain/snow easier. I’d figure a way to utilize that secondary tarp to funnel water to a tank or barrel.
Off hand, I can’t think of a clever way to curl the ends up, have a small perforated pipe wrapped in that curl and still be able to secure the entire tarp ends down so wind doesn’t blow it away but I’d ponder something like that. Probably the easiest though is to use the tent platform to mount a frame and gutter securely and simply divert the water coming off each side of the tent fly into it.
I’d keep any rain barrels/tanks on the ground since that would be a lot of water to support and keep in mind, that water would not be good for drinking unless, filtered, treated in some way or boiled. Best of luck and stop on by again anytime. Thanks for the question. Ron